![]()
- Video: Installation and Setup
- GPX/KML files and timeline
- Start navigating or a simulation
- Pause and Stop navigating or recording
- Other buttons and features
- FAQ / Help
INSTALLATION AND SETUP OF ROUTES
It is very important that you set up your mobile phone correctly so that routes can work properly. Especially the battery settings are often a reason why a navigation or recording doesn’t work correctly. This video will help you to make the right settings. For more special details please visit ‘Power Management‘.
Video as text …
First, please read our terms of use, then proceed with the initial setup. Now allow ‘ROUTES’ to access the location of this device while you are using this app. ‘ROUTES’ collects location data to navigate you along a route or to create a record of the distance you have travelled. An second, allow ‘ROUTES’ to access the memory of this device to open and save saved GPX/KML files for you and to access offline maps of you. To make ‘Routes’ work reliably, the battery settings of your phone must now be adjusted. Turn off Android battery optimisation for the app Routes . Navigation/recording may otherwise be interrupted by your Android phone! In the settings, select ‘ALL APPS’, find ‘ROUTES’ and set it to ‘DO NOT OPTIMISE’! Then return to the app. Furthermore, there are some phone vendors (e.g. Huawei, Samsung, ASUS, HTC,… ) with additional manufacturer-specific battery management. These switch off ‘power-intensive apps’ such as ‘ROUTES’. This can interrupt subsequent navigation! Therefore, please make sure that ‘Run in background’ is set for ‘ROUTES’. For example for Huawei: Find ‘ROUTES’ in the settings and allow Routes to ‘EXECUTE IN BACKGROUND’! Then return to the app. Please note our instructions at the end of the setup, then we are ready to go. Now have a lot of fun with ‘ROUTES’ and give us your feedback to mail@routes-navigation.de !
GPX and KML files can be opened and imported in different ways.
- You can directly go to your file browser, installed on your Android phone, and select the downloaded gpx or kml file. Routes then detects the file type, opens and loads the selected route. It may be that you have several apps installed on your phone, then you will be prompted to choose Routes to open the selected file.
- In your timeline you will find all your recordings (record button) and recordings from completed navigations (navigation button). In addition, you have the option of importing external GPX and KML.

Open your timeline with the timeline button, it has the following anatomy:
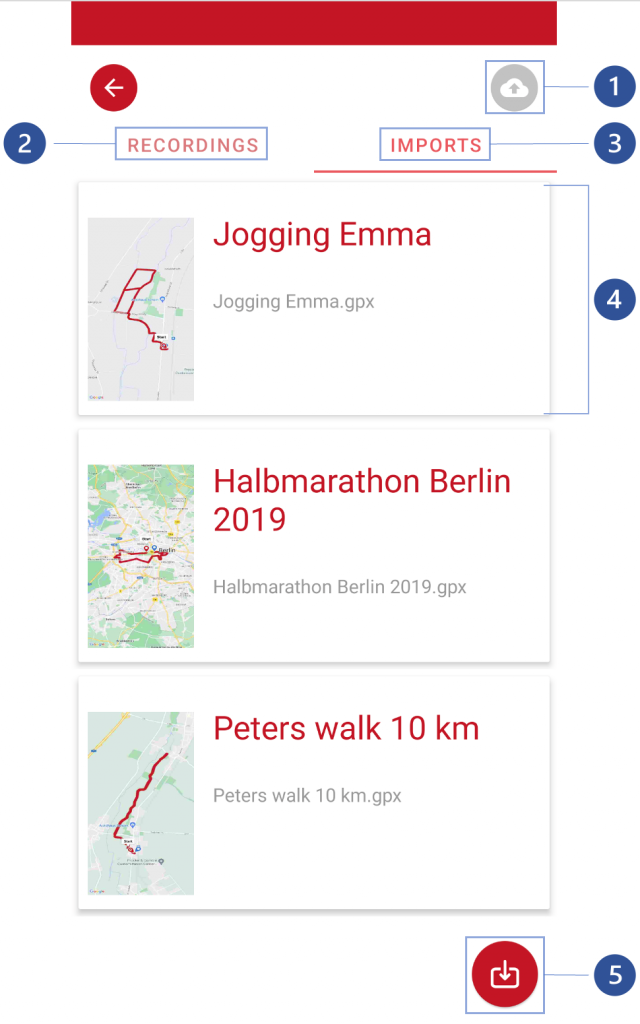
- Backup and restore your timeline here.
- List of all Recordings resulting from an explizit recording or from a completes navigation.
- List of all imported external GPX and KML files.
- ‘Tap’ on a card to load a recording / import into the map. Open the context menu with a ‘longpress’ to share, save separately in the filesystem of your phone or rename a recording/import. ‘Swipe’ the map left or right to delete a recording/import.
- Import an external GPX or KML file here.

START NAVIGATING OR A SIMULATION
If a route from a GPX or KML file is loaded and displayed on the map, you can use the blue navigation button to start guiding the route (simple click).
- The route starts when you are near the start coordinate or Routes detect that you are already on the track.
Alternatively, you can use the blue navigation-button to start a simulation of the route first (long press). The simulation helps you to orient yourself along the loaded route, get information and plan your route well. Over 3 modes you can control speed and map zoom. Furthermore, you can freely choose the position within the route. If you have an internet connection, all required map tiles are saved during the simulation and are then available offline.
PAUSE AND STOP NAVIGATING OR RECORDING

You can pause a navigation or recording by pressing the pause button. To prevent the pause button from being accidentally triggered in your pocket, we have designed a safety slide. You pull the red button to the right to finally pause. Afterwards, another display gives you the option to continue navigation or recording or to stop it finally.
HINT: If you choose ‘pause’, you can continue later at the same point, the display of all elements on the map will remain. If you choose ‘Stop’, the route you have completed will be loaded onto the map. In the case of navigation, this means that the navigated route is then hidden and only the route you have actually completed is displayed.

The my current position on map button shows the current direction of rotation of the map, with the red pin indicating north (not to be confused with that of the compass north). The blue dot in the middle appears when your current position is centred on the map. A single click on the button rotates the map northwards if it isn’t. If the map is facing north and you click again, the map centres on your current position.

If your phone is equipped with a compass and it is switched on in the settings, it shows the main compass direction north with the red side. This may be different from the direction of rotation of the map. Please see above.

The record button starts recording your movement. After you press the Stop button, the recorded route will be saved as a GPX file. Alternatively you can share it with other apps.
This button is not always visible. For example, if you have loaded a route, the navigation button will be available instead. In this case you can make the Record button visible again by pressing the Back button and then selecting the function “Reset map” or alternatively restarting Routes .

The reverse button reverses the direction of the loaded route. Start and destination are twisted so that you can navigate a route in the opposite direction.


The mute button allows you to mute the alarm for about 10 minutes after simply pressing it. If you press the button again, the alarm is permanently muted.

The navigation mode button has 3 states. ‘Walk‘, ‘bike‘ and ‘manual‘ change the zoom factor of the map accordingly. Furthermore, this setting changes the distance at which a turn-by-turn instruction is spoken by the voice assistant. The ‘manual‘ navigation mode allows free adjustment of the zoom during recording or navigation via the zoom slider on the left side of the map. Please note that you have to ‘re-center’ the map after changing the zoom using gestures on the map.
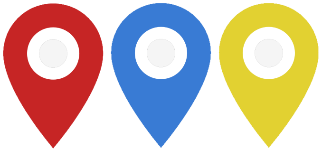
The different markers have the following meaning:
The red marker shows your position or the start of a route on the map.
The blue marker shows the destination of a loaded route. A route can also consist only of a waypoint marked on the map like a geocache. In a navigation to this waypoint, you can orientate yourself by the blue dotted line on the map.
The yellow marker is a waypoint set during a navigation or a recording, to which a name can be assigned in order to remember this location. Waypoints are saved with your navigation or recording in the gpx file.

The re-center button is shown when you manually turn off automatic location tracking by moving the map out of the center during navigation or recording. So if you manually zoom or navigate the map, you can use the re-center button to re-center the map on the auto-tracking of your location.

The gps is missing indicator appears when Routes does not receive any useful location information from your Android phone for about 10 seconds. Click on it to get hints about possible reasons. Some reasons may be:
- Your phone does not have sufficient gps or network signal, please check your phone connectivity.
- Location access is disabled on your phone, please switch it on.
- Android Battery Optmization is not switched off for Routes.
- Other battery safers are installed and prevent Routes from running correctly in the background
FREQUENTLY ASKED QUESTIONS (FAQ)
Please visit our FAQ / Help Site.